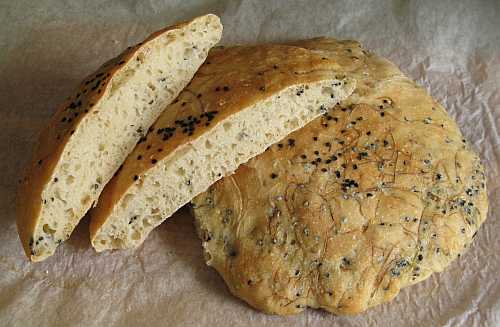
![Bread Baking Day #11 - one year anniversary: Bread with sprouts [July 1st, 2008]](http://farm4.static.flickr.com/3032/2555931498_3c0e48f1bc_o.jpg) To prevent having too much time during the organization of the Gardening & Cooking Event ‚Red and Black Currants‘ I also participate in the bread baking day #11 – Bread with sprouts.
To prevent having too much time during the organization of the Gardening & Cooking Event ‚Red and Black Currants‘ I also participate in the bread baking day #11 – Bread with sprouts.
I have very freely adapted my recipe for flatbreads with onion sprouts from here and here.
Originally I wanted to use radish sprouts, but the seeds didn’t sprout but got mouldy instead. Since I didn’t have enough time to try a new batch, I went to the wholesale market, which normally sells every sort of sprouts one can imagine. But too bad: no delivery today. So I took some onion sprouts instead.
Flatbread with Onion Sprouts
| Source: | 1 x umrühren bitte June 28th, 2008 by Sus |
| Categories: | Bread, Flatbread, Yeast, Onion, Sprouts |
| Yields: | 2 smaller pieces |

Ingredients:
| Sponge: | ||
| 80 | gram | Wheat flour |
| 1 | teaspoon | Dry yeast |
| 45 | ml | Water |
| 1 | pinch | Salt |
| Dough: | ||
| 250 | gram | Wheat flour |
| 150 | ml | Water |
| 1 1/2 | teaspoon | Dry yeast |
| 1/2 | teaspoon | Salt |
| 1 | cup | Onion Sprouts |
| Sponge |
Preparation:
Sponge:
Dissolve the yeast in the water, add salt and flour and combine everything. Cover the bowl and let rest for approx. 2 hours on the kitchen table, then for 12 hours in the fridge.
Dough:
Put the sponge and the other ingredients – without the sprouts – into a large bowl und mix evenly. At the beginning this is possible to do with a wooden spoon, later use your hands to knead the dough until it does not cling to the bowl’s sides any longer. This is the time to work in the onion sprouts.
Let the dough rest for an hour, and then make a Stretch ’n Fold.
Let the dough rest again for half an hour. Bring the dough into the desired shape(s) (here: two flatbreads), put on a tray covered with baking paper and let rest again for 2 hours.
Preheat the oven to 230°C. Before putting the breads into the oven, spray them and the inside of the oven with some warm water. My oven has a setting for baking and keeping the moisture inside instead of venting it. After 10 minutes set the temperature to 200°C and bake for 25 to 30 minutes. Attention when opening the oven: Hot steam will come out! The bread is done when there is a hollow sound if you knock on the bottom.
Notes:
The onion sprouts tasted a little bit like onions (really?) and a little bit like nigella seeds. Tasty!
Now, after I’ve read the original recipes again, there isn’t much I did not do wrong. E.g. I used plain wheat meal instead of the fancier ones, then I used way to little, but it seems I compensated instinctively by adding the correspondingly correct amount of water.
The stretch ’n fold technique really worked. It worked so well that I did it three times one after the other just for the fun of it.
For the last resting period I let the dough sit not for two but for five hours. Despite the high yeast percentage of the dough it was quite deflated.
Still, I like them. One day in the future (when I’ll be a grown-up) I will bake the ultimately perfect bread. Until then I have a lot of time. 
